

It will save you a lot of time to get the right setup going from the start. You want every component of your blog to be set up for success from the first post.
It takes time to gain success and reach significant traffic levels, doing this while being handicapped by missing elements or the wrong setup could stop you in your tracks. Follow this free step-by-step guide and you will have an inexpensive setup that will deliver every feature in a reliable and fast way. My focus here is also to save you time and have you take the necessary steps to gain search traffic as you set your blog up right from the start.
I have built a large number of web sites and have determined that the solutions provided here are the best combination for success if you are launching a new blog. You can follow this same tutorial to set up your business website.
Much of what you will read here was instrumental in my ability to reach 600,000 unique visitors and 2,400,000 page views per month on our Ecommerce site.
When building your blog, having the right setup will reduce your workload and expedite your success.
I want to mention that I have business relationships and affiliate marketing relationships with many of the services mentioned in this guide, I will never let that get in the way of helping you find the right solution. I will always advise you to use free or less expensive methods unless there is a compelling reason not to.
My affiliate programs compensate me if you sign up through my links, but this is at no cost to you. The affiliate links in this article are actually a way for you to get the best price when you buy the service.
How Do I Create Create a Blog That Will Drive Search Traffic?
To get right to the point I will assume that you know what a blog is and that you also know the business benefits and income potential that blogs have.
The bottom line is that your blog, if built and maintained correctly, should become your most valuable channel. Unlike your social media profiles, you own your blog and the domain that is associated with it.
You can control the destiny of your blog more then any social media account you may use. Your blog will be an asset that you can sell as a business. It also has the potential to drive a lot more traffic in the long term than almost any social media account (unless you are a celebrity of world renown.)
Table of Contents
1The First Step to Starting a Successful Blog Is to Choose a Profitable Audience

If you are starting a blog for non-profit reasons, read the title above as: “The First Step to Starting a Successful Blog Is to Choose an Audience That Will Be Engaged and Make a Difference“. Maybe you want to build a community around your love for a cause. If you are well funded to do such a thing there is no concern for money.
If you have an eCommerce store or small business, the audience question is more easily answered. Even in that case, you should take time to answer the audience question and take into consideration things like:
- What audience would be likely to increase my conversion rate and average order value?
- What potential customers are currently not able to find my business?
- What questions can you answer for customers that are not currently being served by your business?
If your new blog is the starting point of your business, the answer to the audience question is quite different.
I think that it is appropriate to warn you at this point that if you choose an audience that is very frugal or one that has an interest but is unlikely to spend much money on that interest, you may want to change your target audience.
If you are not interested in earning an income and it is all about the passion and interests, do as you please. If you want to earn money then you should target a group of people who you can solve some problem for and who will readily spend some money on the solution.
Your audience should have a pain point and you should be able to resolve that for them. Perhaps they need reviews of competing products in order to make up their mind. You can sell them either product but also inform them.
Perhaps they need a technical question to be answered and you will have the perfect business solution in the list of affiliate marketing relationships that you are planning to build.
Generally speaking, you will find higher conversion rates in the B2B (Business to Business) space then the B2C (Business to Consumer) world. When folks are using their budget at work they are more likely to spend then they are with their personal accounts.
Folks who are starting a business are likely to have high conversion rates as long as they believe they are going to succeed.
In order for you to pull this off and be a success in the blogging world, you will have a much easier time if you can make profits. Profits have a tendency to motivate people even more than their hobbies and interests.
If you can tune your interests to a profitable audience you will win all around. You will succeed in every way if your blog is both fun to write and profitable.
Some will tell you to blog about:
- Hobbies & passions
- Life experiences
- Yourself
or blog to: - Enhance writing and thinking skills
- Establish expertise
- Increase self-confidence
That is all fine and good, I am here to tell you that if you do not couple one of these things with the ability to make profits, you will likely be one of the 95% of blogs and businesses that fail to make a profit and shut down. If you do not find an audience that is willing to spend money, it is likely that you will stop blogging in the next year or so.
Consider the Following Points When Choosing Your Audience
These are things that you should consider when starting any business, including a blog.
- What is the potential budget of your audience members? Is that number sufficient to support your concept?
- Will you be regarded as an authority in the space? You may be able to fake it until you make it, it will be easier however if you are able to leverage your expertise and get others to cooperate with you that way.
- Is there sufficient demand in the market place for your niche? Competitor analysis, market analysis, and keyword analysis will answer this question.
Choose a Niche for Your Blog
Once you have chosen your target market it is time to choose the specifics of your blogging niche. Here too it is important to be selective based on similar measures used when choosing the audience:
- How specific and selective can your niche be before you narrow the audience too much?
- Are you going for an affluent audience or a mass audience?
- How much competition is there in the chosen niche?
- Can you outperform much of the competition in the chosen niche?
- Are you able to innovate sufficiently in order to compete for an audience in the chosen niche?
2Name Your Blog and Choose a Domain Name

This is a fun step, your blog’s name is the domain name that you choose. Domain names are not expensive so just register another one if you change your mind early on in the process.
There are a few schools of thought on how to name an online business. The right answer is that one should combine optimal branding strategies with domain name conventions that allow for certain advantages when it comes to search traffic.
The availability of the desired domain name is a big consideration. Most words and most common combinations of words have been registered for years. Adding short words like “a”, “my”, or “the” may solve this problem but is not ideal from a branding standpoint. This is especially true if the other variant is, in fact, a competitor of your fledgeling blog.
If it is a personal brand, you can choose your first and last name. If your name has ambiguous spelling and or is very lengthy as in the case of “Peter Fougerousse” you may want to simplify it.
If you are able to simply use words that will often be present in searches related to your chosen niche, that can give you an advantage.
Misspelling words to make a brand often looks gimmicky and is not the best choice from an SEO (Search Engine Optimization) perspective either.
Simplicity and brevity must also be taken into consideration. Short, easy to remember, easy to spell names will give you an advantage.
It is best to register and use a .com .org or .net domain. If you choose a .co, .blog or other newer domain extension, make sure the first part of the domain name is short and easy to remember.
You cannot use spaces in your domain name, but you can use dashes and any combination of letters and numbers. Careful not to combine words that have an alternate meaning when you take out the spaces as these folks did:
- itscrap.com – IT Scrap
- whorepresents.com – Who Represents
- penisland.net – Pen Island
- therapistfinder.com – Therapist Finder
- powergenitalia.com – Powergen Italia
- molestationnursery.com – Mole Station Nursery
Need domain name ideas? Check out this post about the best blog name generators for some inspiration.
If you can’t decide on a good name for your blog contact me and I will personally help you for free.
3Register Your Domain Name

There are many places where one can register a domain, those companies are known as domain registrars. Many domain registrars will also host your site for an additional fee. You can also host your site with a separate web hosting service.
In this article, I will provide you with recommendations and a specific set of solutions that will work for most bloggers who are getting started. These solutions will give you everything you need in terms of speed without compromise. If you follow my recommendations your site will be delivered all around the world at high speed with near 100% uptime.
If you are planning on registering a whole bunch of domains over the years you may want to shop around for the best deals on domain registrars otherwise there is a good chance that you should just go with the same company that you are hosting your site with as a registrar as well. In many cases, you will get some kind of discount if you do that.
There are many domain registrars, the price of your domain will usually be around $10 per year. In some cases, you can get the domain registration for free if you sign up for a hosting service.
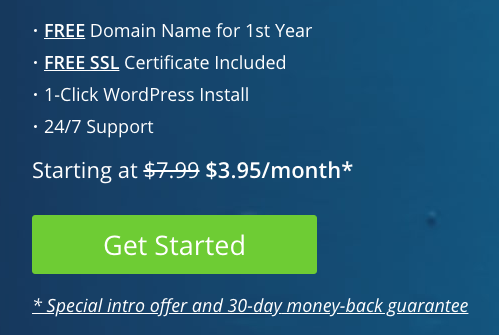
If you are launching a new blog you should use Bluehost as your registrar and web hosting service. They are the biggest and most well-known hosting company. I have a deal with them where you can get started for just $3.95 a month (plus you will get a free domain name and free SSL certificate). Bluehost compensates me if you signup through my link above, but this is at no cost to you.
I use Bluehost myself for many websites. I would not recommend them here unless I believed in their service. When you get started with them you can go with the basic package. Once you grow to have over 25000 visitors per month you can simply upgrade to their VPS (Virtual Private Server) Hosting or Dedicated Hosting.
List of Top Domain Registrars
There are hundreds of other registrars and they will all do the trick. There are small pricing differences. They all try to tack on a lot of services, most of them are unneeded. Some folks may want to use the privacy features. I personally only use the privacy feature when registering a domain.
Change the Nameserver in Your DNS Settings With Your Registrar
Regardless of where you register your domains you can always point them to any web hosting service that you would like to use. All you need to do is change the Nameserver in your DNS settings with your registrar.
Here is an example of how that is done on GoDaddy:
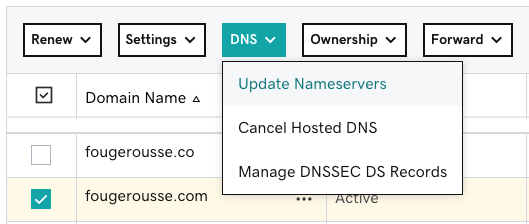
You simply choose to update the Nameserver and change it to the one provided by your Hosting service.
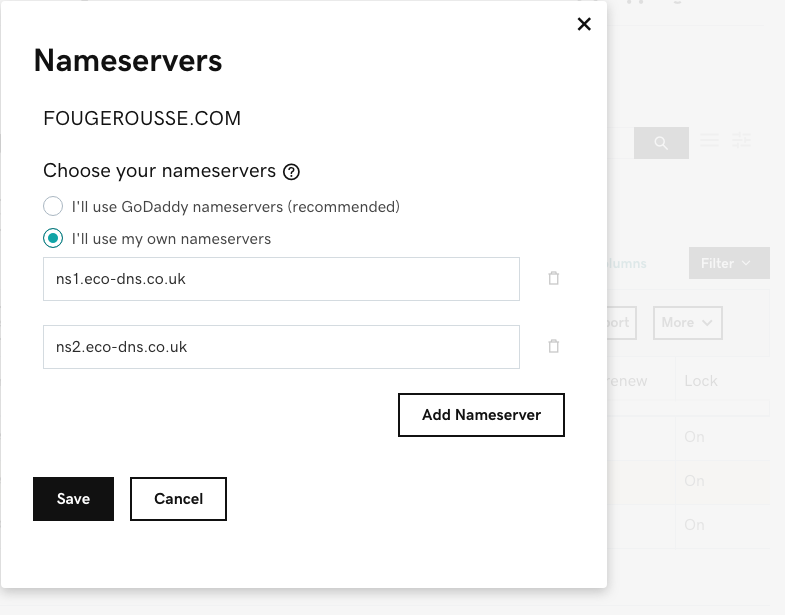
If you use the hosting service provided by your registrar you will not need to update your DNS Nameserver.
All of the Domain Registrars have similar setup options that allow you to modify your Nameserver. When you change this setting you are telling the world where it can find your website.
DNS servers around the world will communicate with one another automatically and update the new Nameserver destination for your domain. To track the progress you can use any DNS Propagation tracker like dnschecker.org.

It can take up to 24 hours for your new Nameservers to propagate globally, usually it works in less then 30 minutes in 2024.
4Choose a Blogging Platform
I am going to jump the gun in this section and tell you that WordPress is the right solution for almost all readers.
Companies like Wix who have developed very easy to use alternative solutions do serve their purpose as well. Wix is able to be set up in minutes and requires no technical skills. If you need to create a site in a flash and point people to it, WYSIWYG drag-and-drop website builders are a perfectly good tool for the job.
If on the other hand, you want to build an audience around a new site and build organic (free) search traffic to drive paying customers to your business or affiliate programs WordPress is the right tool.
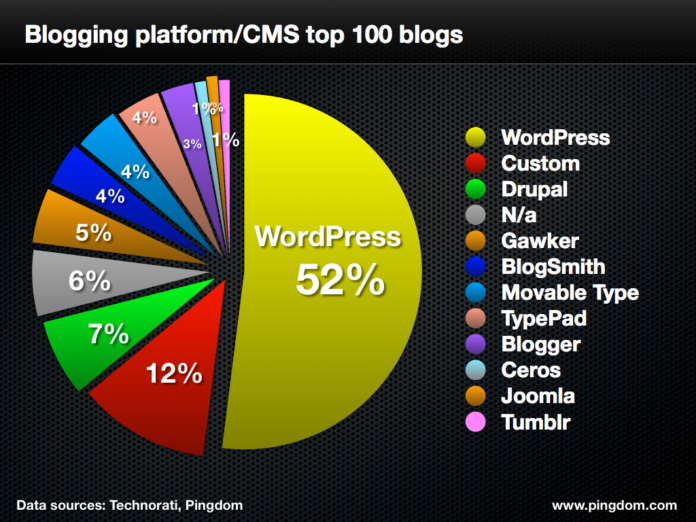
Before I get into the pros and cons of each platform I would like to explain that the biggest blogs and publications in the world use either multimillion-dollar custom-developed blogging platforms or they use WordPress. No other Free or cheap platform even comes close to the level of features that WordPress has. The success of this platform speaks for itself.
There are a few exceptions to the rule, however, if you follow the path of the few successful blogs who use a tool like Google’s Blogger (something.blogspot.com) you will likely not get the best results. I do not even list Blogger as an option below because it ultimately belongs to Google and may not stand the test of time as a business unit. Folks who use the platform will never own their site outright.
Another system that is successful but I would not recommend is Drupal, the system works well for Whitehouse.gov as they work tirelessly to spend your tax dollars but it is not the best solution for an individual or small business. See the pros and cons of Drupal below.
The following list is not comprehensive but this is by choice, I have purposely left out platforms that do not allow you to use your own domain name as well as services where you do not have actual ownership of your site.
There are many advantages and disadvantages to each system. Highly proprietary systems like Wix are easy to use but, not as feature-rich as open-source projects such as WordPress.
Take a look at the pros and cons of each system to get an idea of what is out there.
The general rule of thumb, when it comes to blogging platforms, is that if it is easier to use it is also less customizable. If it is extremely simplistic it will likely be more difficult to make it rank well in search. If it is not sufficiently feature-rich, it will not be able to be customized to suit every business application.
Top Blogging Platforms
- WordPress.org – BEST CHOICE
- Pros
- You have control over every function and feature of your website.
- You can add features like forums, online stores, and paid membership. WordPress is the most business-friendly platform, it is designed to make money.
- WordPress has thousands of free themes. There are infinite possibilities when it comes to customizing the look of your site.
- WordPress has more than 55,000 free plugins. Plugins are apps for your blog that allow you to add features.
- Everything about WordPress is able to be optimized for search. There are many SEO plugins to choose from.
- Cons
- You have to learn some technical skills to get everything to work as you would like (this article will get you most of the way).
- You need to manage your own backups and the security of your site (I will cover this as well).
- Pros
- Drupal.org
- Pros
- Drupal is a good system for creating large complex websites with multiple languages.
- Security is a major emphasis on this platform.
- Cons
- Drupal is more complex than WordPress and every other system on this list.
- As a result of the complexity, Drupal requires more time and effort.
- Drupal has speed performance issues that other platforms don’t have.
- Pros
- Constant Contact Website Builder
- Pros
- Constant Contact Website Builder is easy-to-use with a drag-and-drop website builder. No technical skills are required.
- It has an easy setup since Constant Contact hosts the website for you.
- It has a 60-day trial that allows you to try out the service.
- A free SSL certificate is included.
- Cons
- There aren’t many third-party plugins like there are for WordPress.
- Limited integrations with third-party services and platforms.
- Pros
- HostGator Website Builder
- Pros
- It has an easy-to-use with a drag-and-drop website builder to customize your blog & website design.
- It has an easy setup since HostGator hosts the website for you.
- Website performance, backups, and security are managed by HostGator.
- A free Domain and the necessary SSL certificate are included.
- It only takes a few clicks to add an eCommerce store to your site.
- Cons
- There are not many, plugins, apps and extensions.
- There are not many, plugins, apps and extensions.
- Pros
- Squarespace
- Pros
- Squarespace is for folks who aren’t very tech-savvy.
- It has beautiful professionally designed templates.
- Squarespace offers the ability to use a domain name, SSL/HTTPs, and an eCommerce store.
- Cons
- Squarespace has limited features all of which are part of a proprietary platform.
- Squarespace has very limited integrations, services, and tools.
- Pros
- Wix
- Pros
- You can customize your site using dozens of templates and third-party apps.
- It has an easy-to-use with a drag-and-drop website builder to customize your website design.
- Setup is quick and easy.
- Cons
- The free account shows Wix branding and ads on your site.
- Free third party apps are few.
- You cannot change your template once you set it, you have to start over with a new template.
- Ecommerce features are limited in scope.
- Blog features are limited in scope.
- Pros
- Ghost.org
- Pros
- Ghost.org is great for blogging and writing.
- The interface is clean and intuitive to use.
- Ghost.org is really fast.
- The hosted version has a very easy setup.
- Cons
- Ghost.org is not as easy to customize with apps and plugins like WordPress.
- Due to its simplicity, there are fewer features in general.
- Ghost does not have many themes so it is not easy to customize the look of your Ghost site without incurring development cost.
- If you install Ghost yourself it is a more technical process than WordPress.
- Ghost requires a VPS because you need to set up NodeJS and have a dedicated IP. Because of this, it will not work on a shared hosting service.
- Pros
I must say that I really like where Ghost.org is headed, I even believe that the platform may prove to be real competition to WordPress down the line. I would not recommend it at this point in time due to the lack of ability to customize it without incurring significant development costs. If you are a web developer with a lot of SEO knowledge and experience, have at it. I considered it for this site. Ultimately I went with WordPress because it is the right solution for my audience.
5Choose a Web Hosting Service Provider
So you have chosen your audience, your domain name, and you may or may not have registered your domain.
If you have not registered your domain yet, you can simply do that while setting up your hosting account. Many hosting service providers like Bluehost will let you register a domain for free upon signup to their service.
Bluehost
If you are launching a new blog you should use Bluehost as your registrar and web hosting service. They are the biggest and most well-known hosting company. I have a deal with them where you can get started for just $3.95 a month (plus you will get a free domain name and free SSL certificate). Bluehost compensates me if you signup through my link above, but this is at no cost to you.
Make sure you choose to host your site with an SSL certificate regardless of what service you use. To rank well in search, your site should be “(Secure Socket Layer) https://yourdomain.com” rather than “(Not Secure) http://yourdomain.com”, for this, you need an SSL certificate.
Google started to deprecate http:// sites as “not secure” in 2018. This is not good for your brand or your rank in organic search.
List of Top Web Hosting Providers
- Bluehost
- HostGator
- DreamHost
- Hostinger
- A2 Hosting
- GreenGeeks
- WP Engine
- Inmotion
- SiteGround
- HostPapa
- Kinsta
- iPage
Hostinger
Beyond Bluehost another service that I have had a great experience with is Hostinger. My favourite package from Hostinger is their Business Shared Hosting package. I have a deal with Hostinger where you can get started for just $3.99 a month using their Business Shared Hosting and save 75% (plus you will get a free domain name with an annual subscription and free SSL certificate). Hostinger compensates me if you signup through my link above, but this is at no cost to you.
WP Engine
If price is no object, and you want very high performance for a hundred thousand visitors per month right off the bat I have two recommendations for you. First, I would recommend WP Engine. With my link, you will get 3 months for free and 10% off your first payment (pay for the year and you get 10% that year). The deal is risk-free for 60 days.
Kinsta
The second High-end option is Kinsta. Features that form the basis of their service are, first, the fact that they are fully managed, so they handle optimizing your site for speed, security, and backups (in this post I will teach you how to handle this on your own for free or very cheaply.) Second, Kinsta provides free WordPress migrations from other hosting services. Finally, Kinsta also uses the Google Cloud Platform so they are wicked fast.
Later in this post, I will show you how to make your hosting service perform wicked fast for free using Cloudflare in combination with certain plugins.
So the levels of service I recommend above will serve any need, that being said, most people starting a blog will not need to pay for the higher priced plans at WP Engine or Kinsta.
6Setting Up Your Hosting Service and WordPress
Time Needed : 0 days 0 hours 10 minutes
Some of the steps I will walk you through in this section are specific to Bluehost but most systems are similar.
I will also show the steps needed to configure an existing hosting account using the cPanel which is the most common backend for hosting systems around the world.
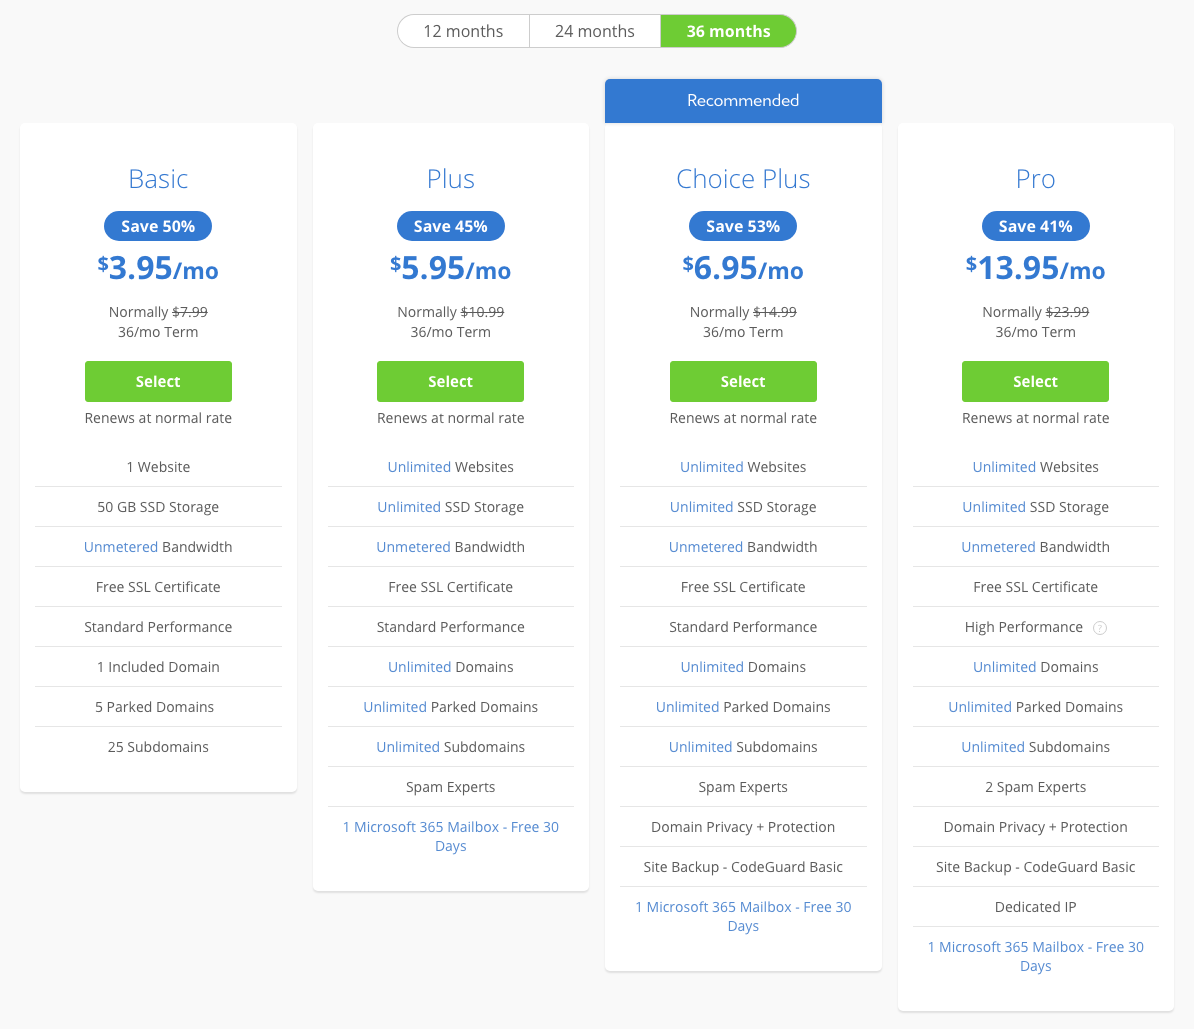
Get Started and Pick a Plan
Simply choose the plan that will currently suit your needs. You can always upgrade if you need better performance or will be adding new sites to the service.

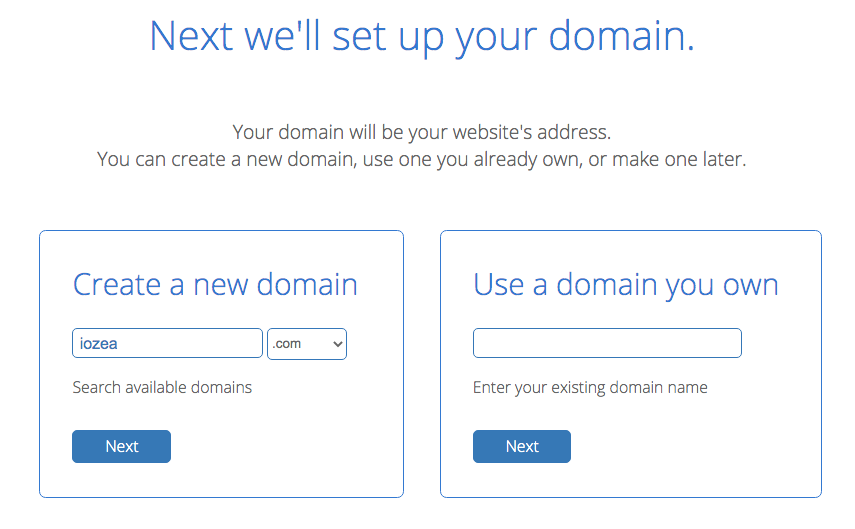
Set Your Domain Up
You can either:
1. Register a domain as part of your account setup process.
2. Use a domain you already own.
If you do not already own a domain, start the process of registration in this step by clicking ‘Next’ and checking availability.
If you do have a domain, enter the domain into the ‘Use a domain you own’ and follow the prompts. You will also need to modify your Nameserver settings in your domain registrar account to point your domain address to the new hosting service.Check the Availability of the Desired Domain
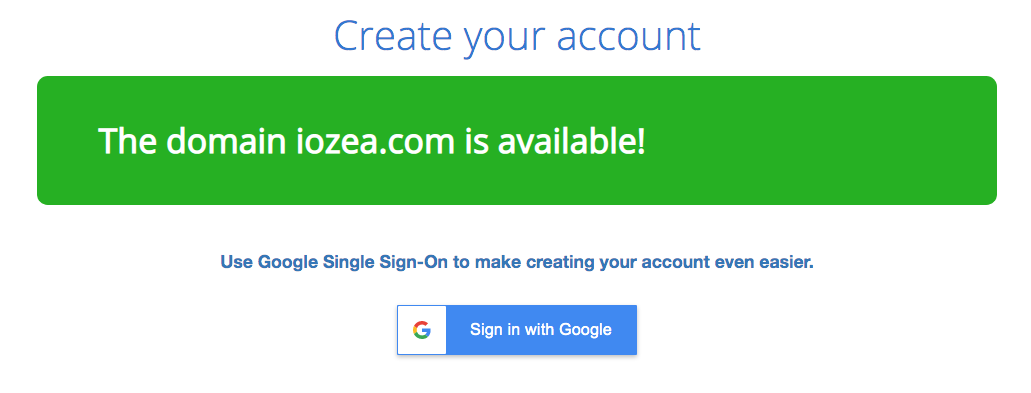
After clicking ‘Next’ in the previous step, the availability of the desired domain will be verified. If the desired domain is available you can set up your account and register the domain in the next step.
Set Up Your Hosting Account
Nothing is locked-in until you add a payment method and set your account up. In this same step, you will register the domain to your account.
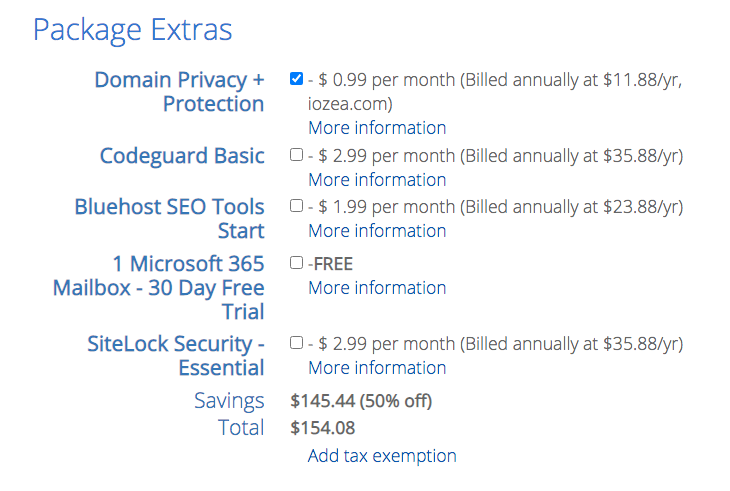
Fill in your billing information. Beyond your billing information, you can ‘Choose Extras’ below.
The only option I recommend is ‘Domain Privacy + Protection‘. Every other feature will be covered sufficiently well (and for free) by the configuration I describe later in this article.Install WordPress With One Click During the Account Setup Process
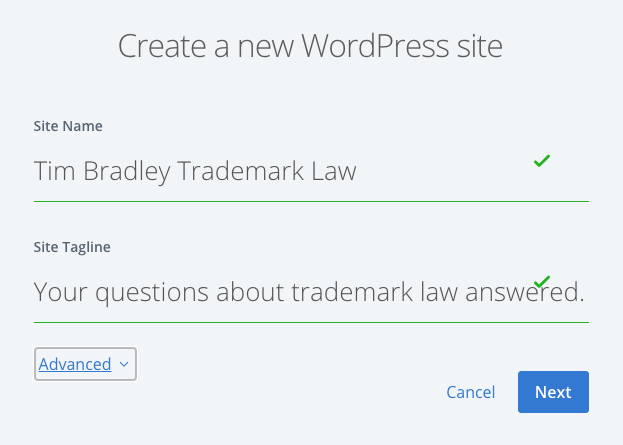
Bluehost will prompt you to set up your WordPress installation in the next step after the payment is accepted.
Add a ‘Site Name’ and ‘Site Tagline’. – THIS IS AN IMPORTANT ELEMENT OF YOUR SEARCH ENGINE OPTIMIZATION. YOU WILL, OF COURSE, BE ABLE TO MODIFY IT LATER. I WILL COVER CHOOSING A SITE NAME AND TAGLINE AT A LATER POINT IN THIS POST.
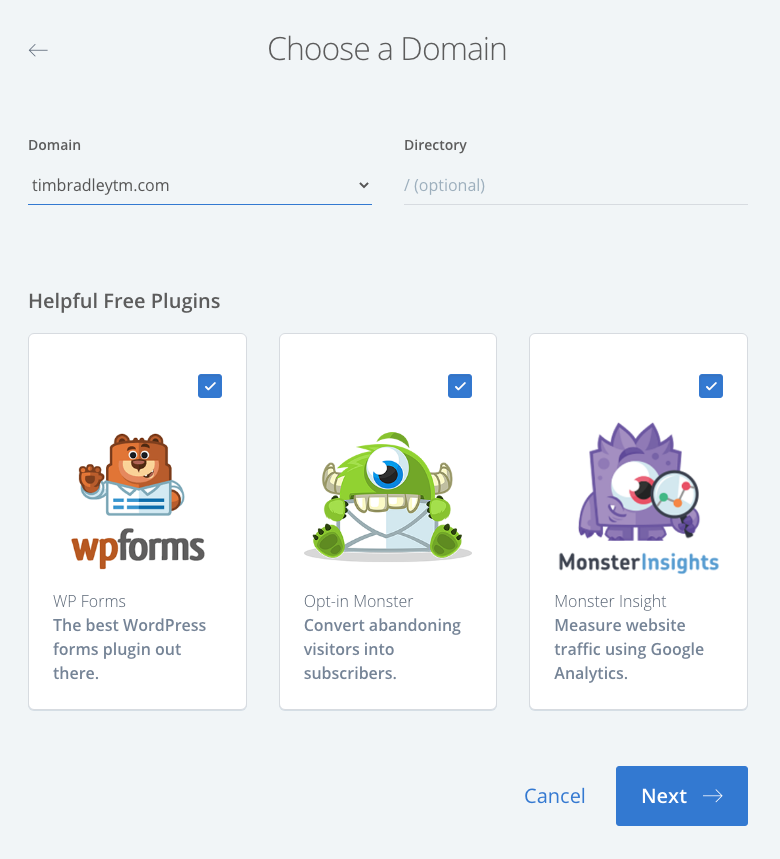
Chances are, even if you are using hosting service provider other than Bluehost you WILL be using the same backend hosting software: namely cPanel. Skip past this next step to see a standard cPanel procedure for setting up WordPress.Choose the Domain You Just Registered to Point to Your New WordPress Blog
In this step simply choose the domain and leave the ‘Directory’ empty. You can leave the ‘Helpful Free Plugins’ checked.
Click ‘Next’ and WordPress is installed automatically.
Set Up WordPress Using cPanel
cPanel is the most common backend for hosting systems around the world. Between this section and the one above you should have no problem trying to figure out how to set up WordPress in your web hosting system. See my step by step guide to set up WordPress using cPanel.
7Update Your User Profile
Before you do anything else go ahead and flesh out your user profile. Elements of what you add to this profile can be displayed throughout your blog and even when you comment on other sites. This could include the link to this new blog that you just started.
Needless to say, that will help people find and identify your work and your site.
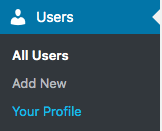
Go to ‘Users’ > ‘Your Profile’
Add your full name, link to the new site and all your social media accounts.
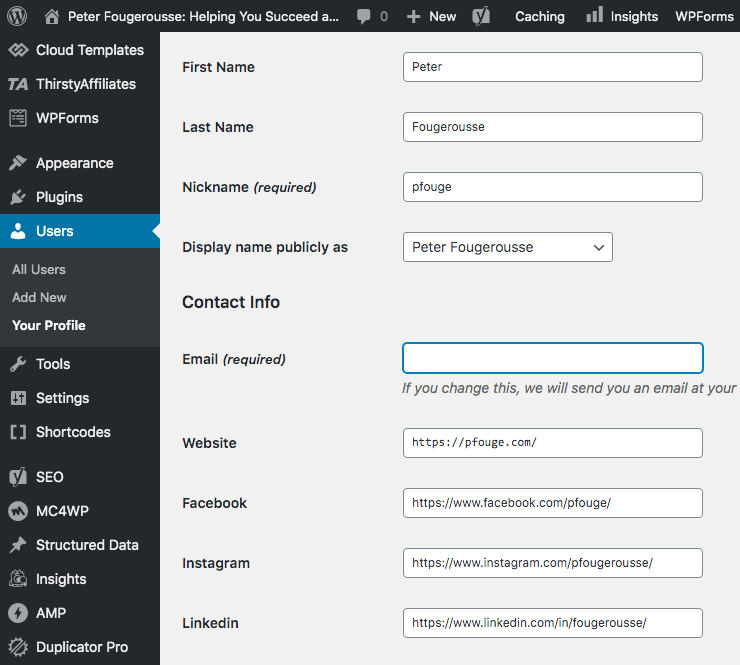
You should also add a bio and a picture by setting up a Gravatar account.
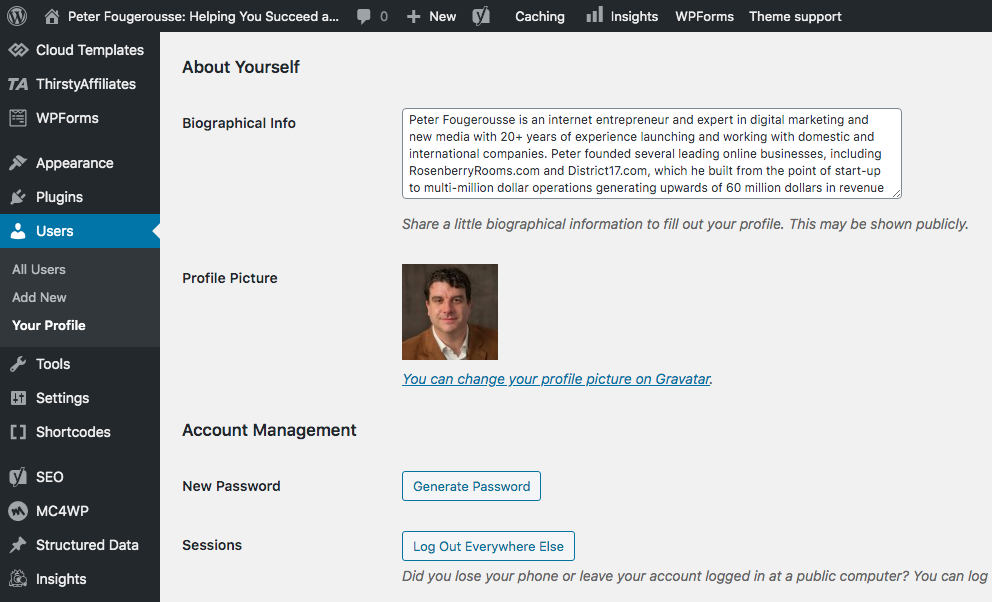
All of this info is part of your brand including your picture. If you succeed people will start to recognize you online and that will make your job a lot easier.
8Change Your Permalinks Settings
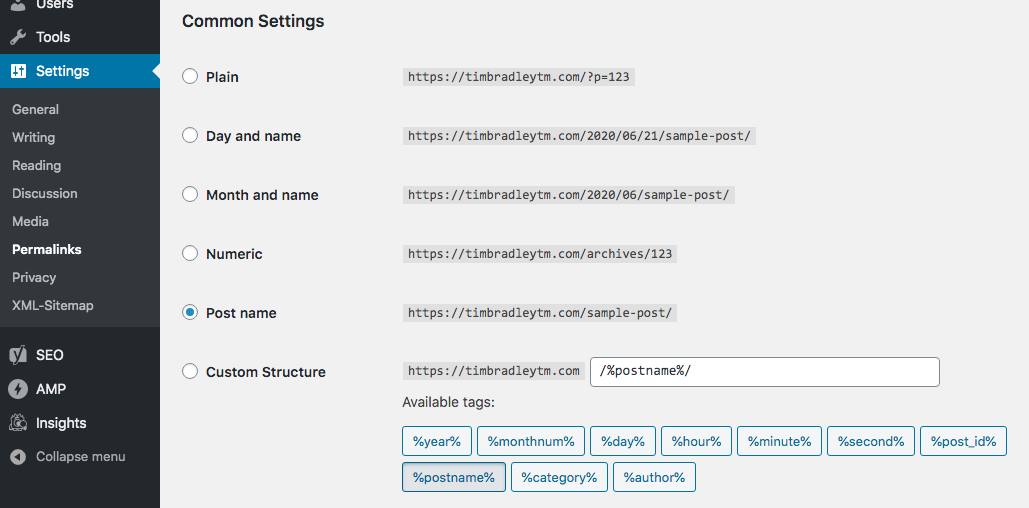
This is a simple one step process but it is very important. Changing this setting will make your URLs of your posts readable to humans and search engines alike:
In the Dashboard click on Settings > Permalinks and change the button to the ‘Post name’ position.
Finally click ‘Save Changes’ at the bottom of the screen.
9How To Install WordPress Plugins
As we work our way through this tutorial I will tell you how to configure each plugin optimally. In this section, I will simply walk you through the list of plugins that you need to install and the basic setup of each.
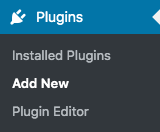
The fastest way to install plugins is through the ‘Plugins’ menu in the WordPress Dashboard*.
*(yourdomain.com/wp-admin – replace ‘yourdomain.com’ with whatever your domain is.)
Click ‘Plugins’
Click ‘Add New’
Then key the name of the plugin into the ‘Search plugins…’ field.

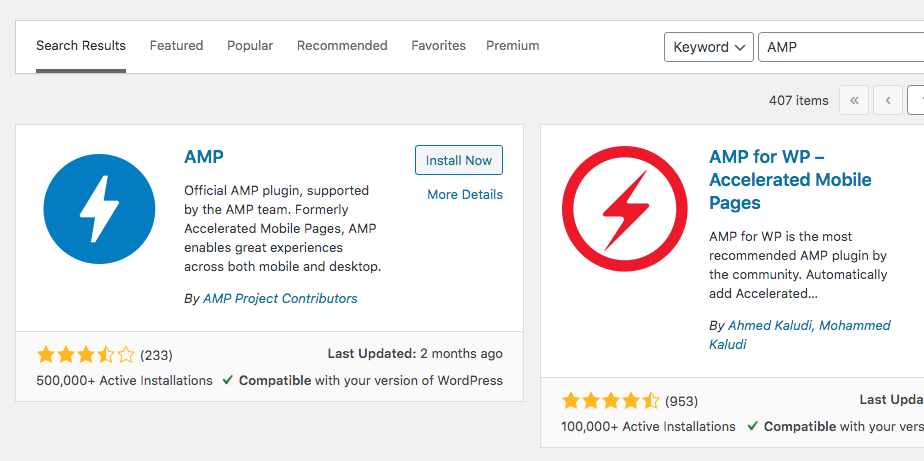
Click the ‘Install Now’ button on the appropriate plugin. Make sure you have the right one (many plugins have similar names.)
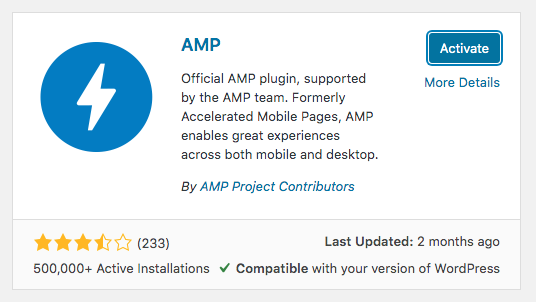
Finally, if you are ready to start using the plugin that you just installed you can press the ‘Activate’ button.
Now you will see the newly installed and activated plugin in your ‘Plugins’ screen.
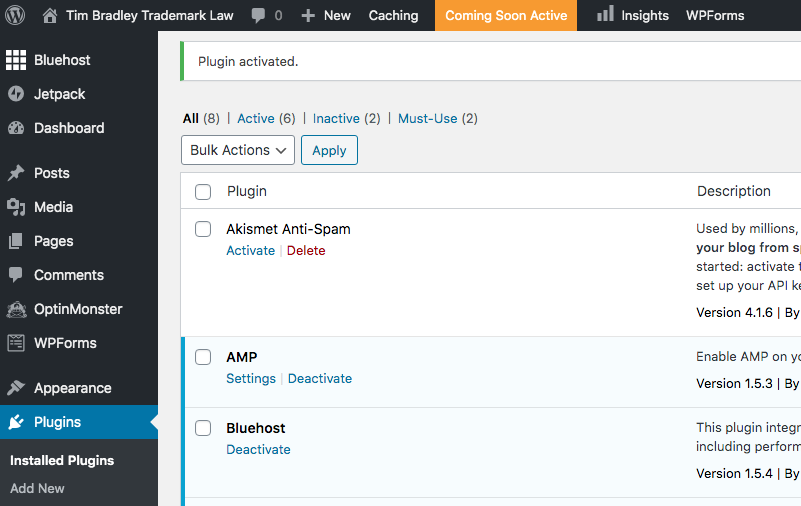
From here you can configure the settings of the plugin by clicking ‘Settings’.
10Install Plugins That Make It Easy to Set Up Google Search Console and Google Analytics
You don’t need any WordPress plugins to set up Google Analytics but this process I will show you will make it easier. For Google Search Console, you definitely will need to have some XML sitemaps set up. WordPress plugins like Google XML Sitemaps make that really easy.
Install and activate the following plugins first:
File Manager Advanced
By modalweb
The purpose of installing this plugin early on is that it may come in handy for site verification purposes. You may need to drop an HTML file in the root of your ‘public_html’ folder for Google or some other service provider.
You can also use the file manager in cPanel but it is quicker to do it right in the WordPress Dashboard with this plugin.
Google XML Sitemaps
By Arne Brachhold
The purpose of installing this plugin early on is that you need an XML Sitemap to integrate with Google Search Console and Bing Webmaster Tools.
I recommend you set it up with the following content settings:
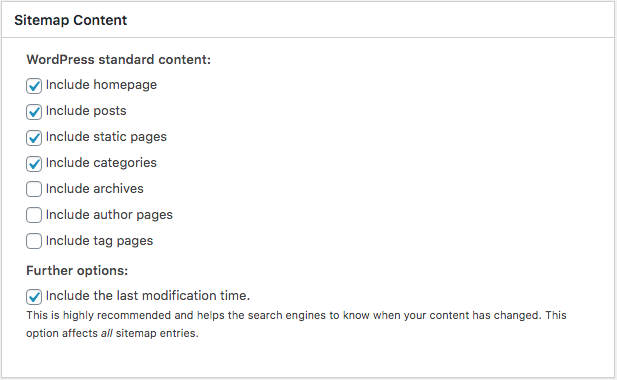
The Yoast SEO plugin is another way to set these up. I use this plugin instead and disable the XML Sitemap feature in the Yoast plugin. This is because I have had trouble with the Yoast XML Sitemaps before on large sites with many thousands of posts.
Google Analytics for WordPress by MonsterInsights
By MonsterInsights
The MonsterInsights plugin is a simple way for you to integrate correctly with Google Analytics and track your affiliate links in the process.
In order to seamlessly track your affiliate links if you use the ThirstyAffiliates plugin add the ‘/recommends/’ path with the label ‘affiliate’. You can also take care of this in the setup process. I walk you through this process in the next section.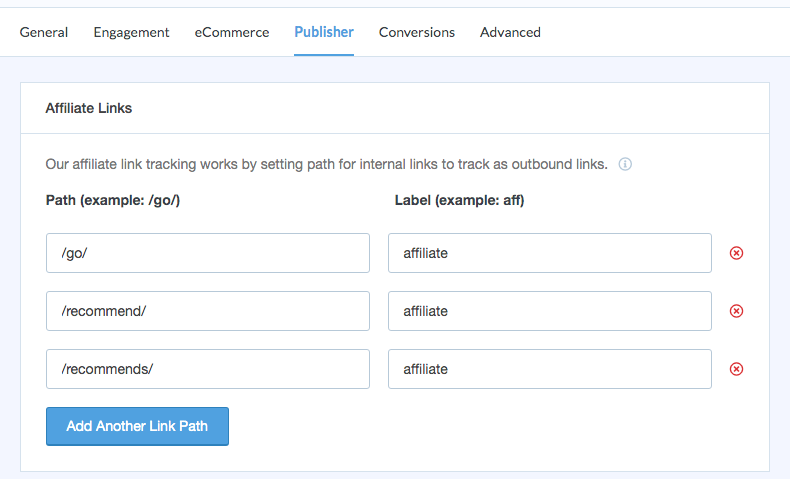
11Create a Google Analytics Account and Connect Your Site to It

You’ll need to ensure you have a Google Analytics account at http://analytics.google.com/ (this is not the same as a Gmail account.) Follow the steps linked to here to set one up and connect it to your site using the MonsterInsights plugin.
After you have completed the steps in the link above, your site will now track your traffic in Google Analytics as well as any clicks on your affiliate links once you set them up.
12Create a Google Search Console Account
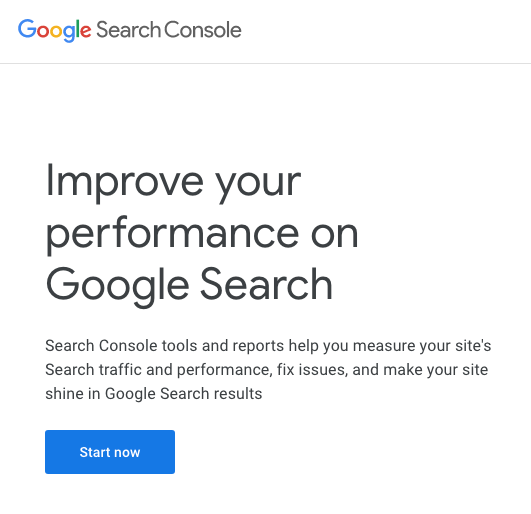
You can create a Google Search Console account at https://search.google.com/search-console/ (this is not the same as a Gmail account.) Follow the steps below to set one up and connect it to your site.
- Go to the >Google Search Console site
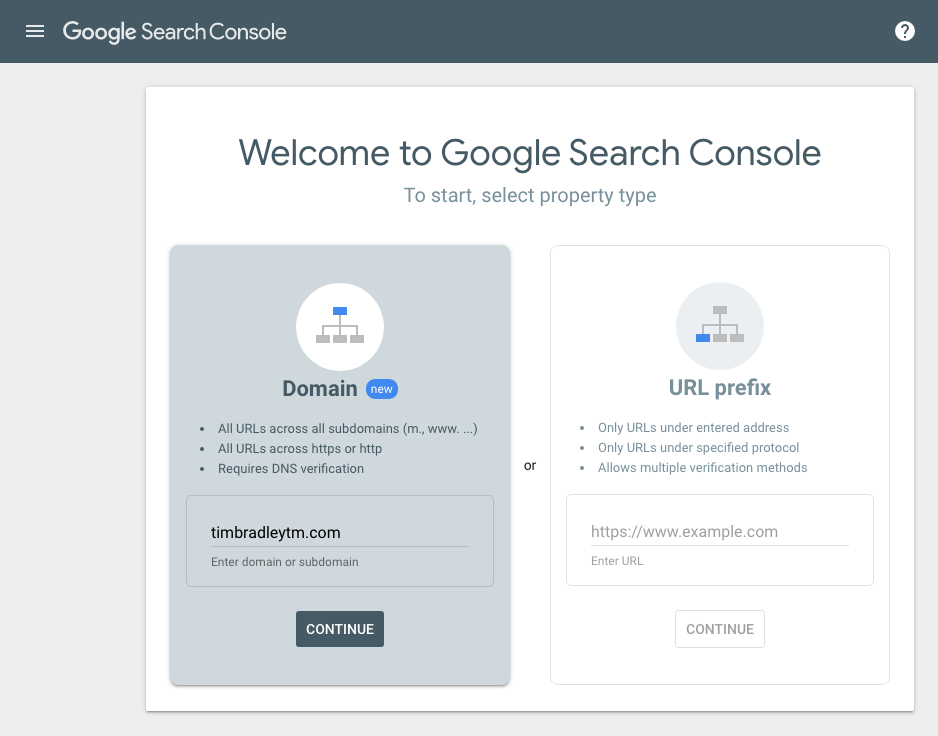
Click ‘Start now’. After this, you will log in or select your Gmail or Google Apps account. If you do not have an account with Google Apps or Gmail, you will need to create one.
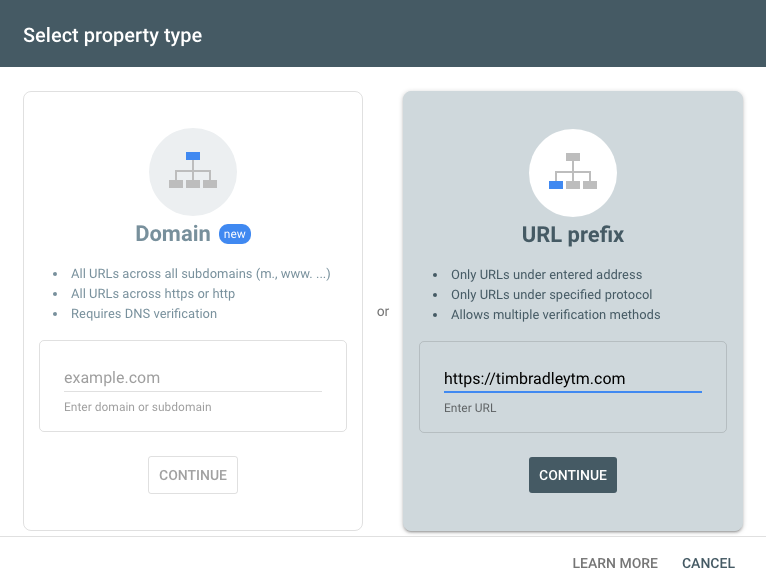
Once you are logged into your Gmail or Google Apps account you will be taken to the following screen: - First, you need to add a domain to your new Google Search Console account. Enter your domain name without any ‘https://www’ just the domain as you see in the example ‘timbradleytm.com’ .
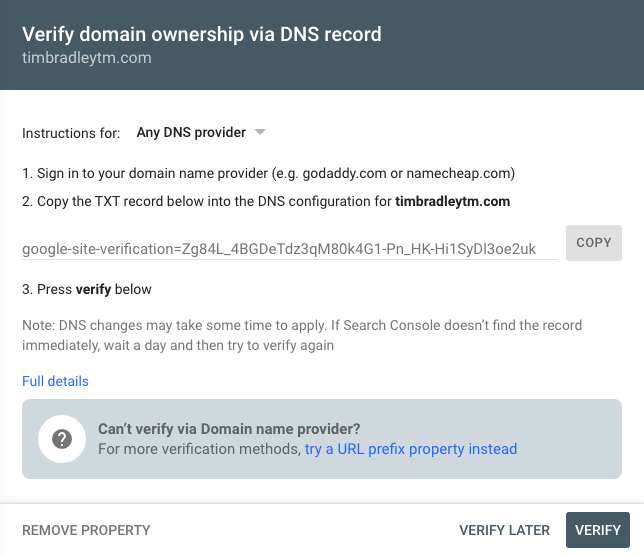
Click ‘CONTINUE’ - In the next screen, you will receive instructions on how to verify your ownership of your domain. The method of choice is to add a TXT record to your DNS settings in your domain registrar account.
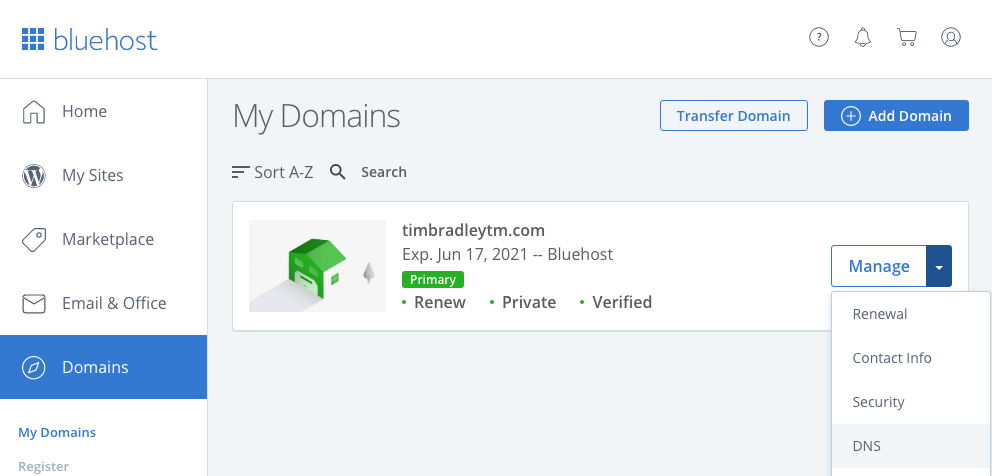
Click ‘COPY’ next to the TXT record text to place it in your clipboard. - You must sign in to your domain name registrar account (for example, Bluehost.com, GoDaddy.com, or networksolutions.com).
- Go to the area of your domain name registrar account where you can manage your domain settings.
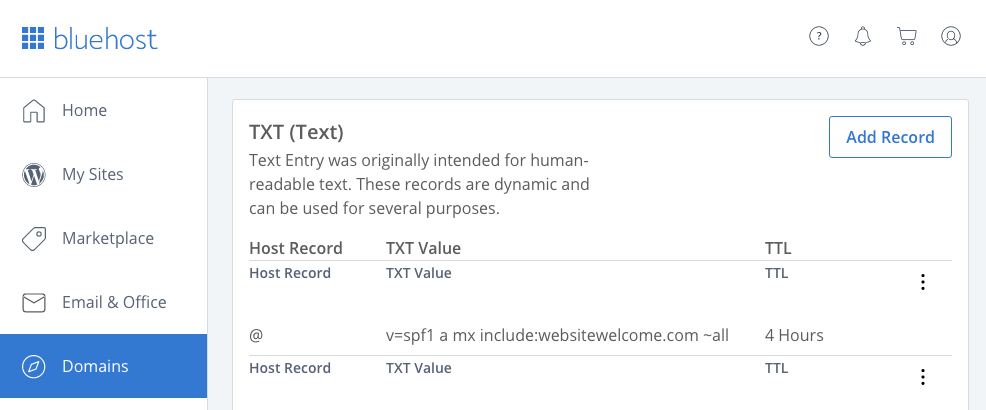
Click on the link to change the DNS settings for the domain in question. - Scroll down the page until you find the section that allows you to add a TXT record.
Click to add a TXT record. - Typically the new TXT record will include:
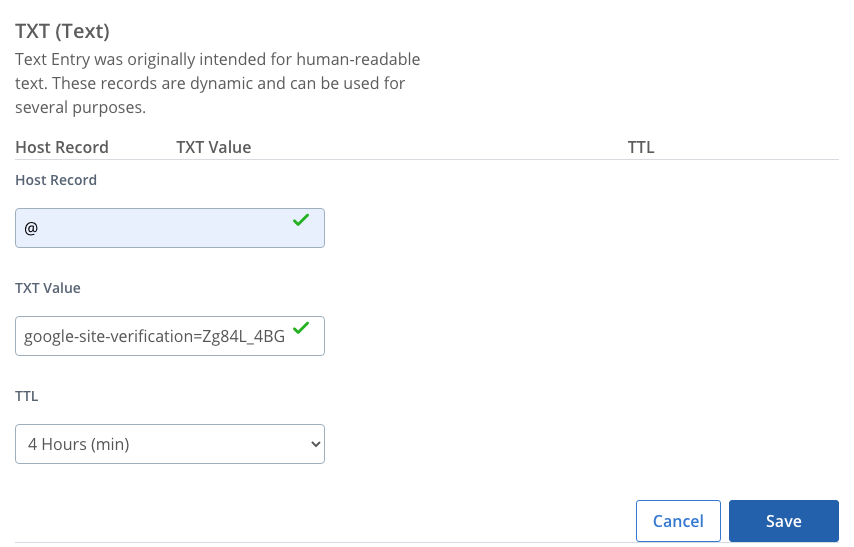
- A ‘Host Record’ which you can set to ‘@’
- A ‘TXT Value’ where you will paste the record you copied from Step 3
- And a ‘TTL’ which you can usually set to 4 Hours
Once you have set these values you can save the TXT record.
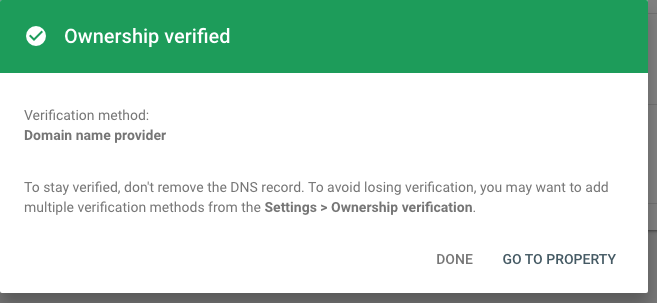
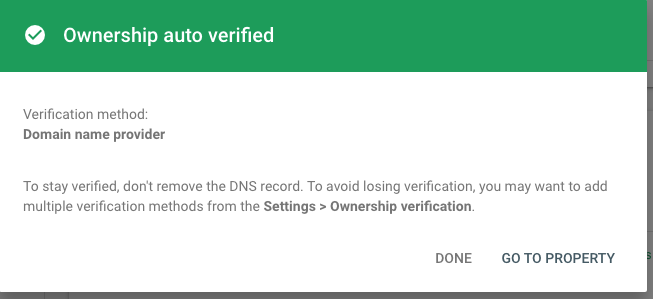
- After you have saved the TXT record in your registrar account under the domain name’s DNS settings as stated above, you can now click the ‘VERIFY’ button.
- If the steps were followed correctly you should see the following notice:
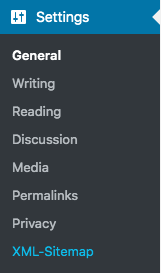
You can now click ‘GO TO PROPERTY’ - In this step, you will add your XML Sitemap to the new domain property that was added to Google Search Console (this step assumes that you have already installed the ‘Google XML Sitemaps‘ Plugin mentioned in previous sections.) Go to your WordPress Dashboard and click on Settings and then click on XML-Sitemap.
- The URL to your sitemap index file will be found on the XML-Sitemap settings page and will look something like https://yourdomain.com/index.php?xml_sitemap=params= *
*(https://yourdomain.com/index.php?xml_sitemap=params= – replace ‘yourdomain.com’ with whatever your domain is.)
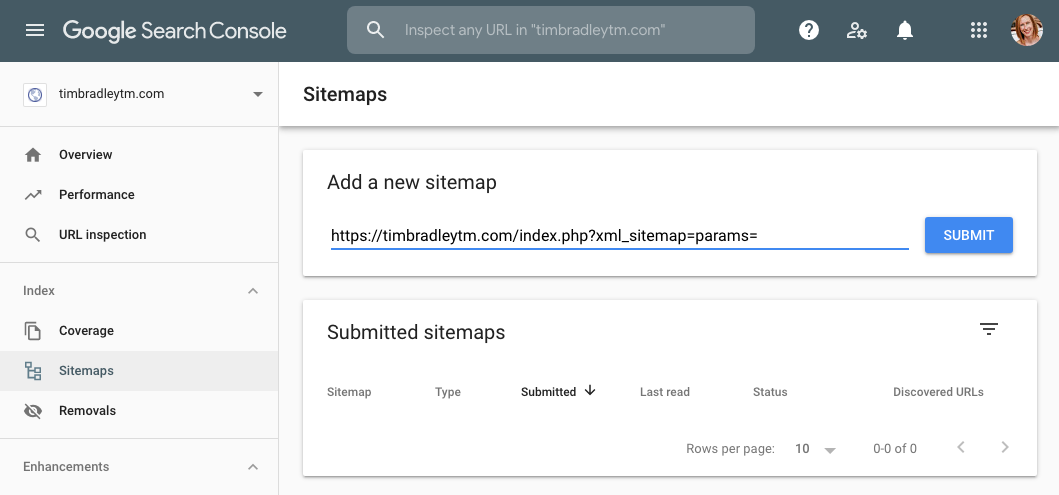
Copy the URL of your XML-Sitemap - In the Google Search Console click ‘Sitemaps’ and paste the URL of your sitemap in the field.
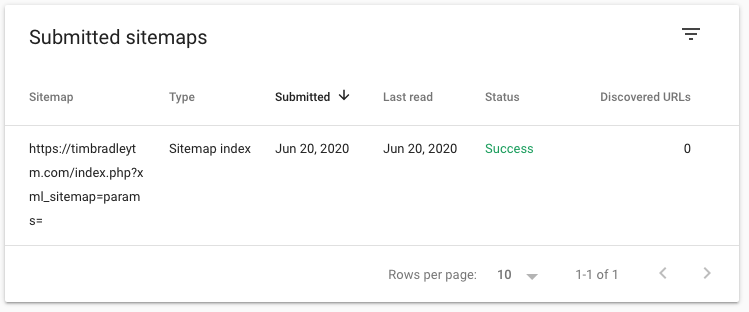
Click ‘SUBMIT’. - If you followed the steps correctly you should see the following info on the ‘Sitemaps’ view in Google Search Console:
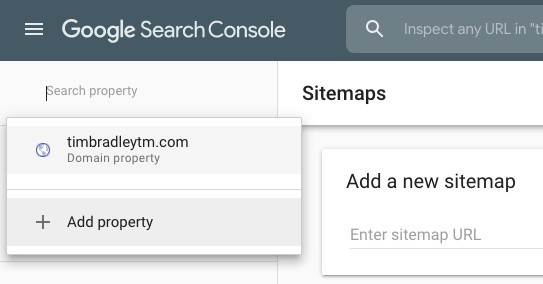
- The final step is to add any domain prefixes that you have to the Google Search Console. An example of a domain prefix is ‘https://’ or ‘https://www.’
To add a prefix, click on the domain property in the top left of the Google Search Console and click ‘Add property’ - You now have the opportunity to add the URL of your site with the prefix you wish to track in the Google Search Console.
Enter the URL with the prefix and click ‘CONTINUE”
If you followed the step correctly you should receive the message displayed below:
Repeat the last two steps for any additional prefixes. In this case, I will also add ‘https://www.timbradleytm.com‘. I should mention that Tim Bradleyis my Intellectual Property attorney and he is the best in the business!
13Install Plugins for a WordPress Blog That Is Optimized for Search Engines and Makes Money
Rather than going into lengthy descriptions of how to set up each plugin, I will share how I have set them up om my sites. You will need to adapt the wording of any text I have added for your own business and audience.
We will go through all of these in alphabetical order except for in cases where there is a required sequence.
Yoast SEO
By Team Yoast
This plugin is arguably the most important plugin for SEO purposes. See my post about on-page SEO to get a good idea of how to use the Yoast plugin as you write your blog posts.
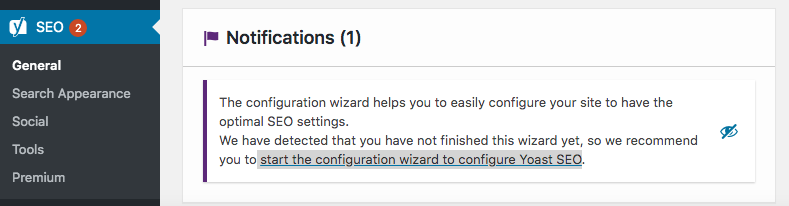
After you install and activate the plugin go to the Y SEO settings in your WordPress dashboard and launch the setup wizard (the link will say “start the configuration wizard to configure Yoast SEO“.)
After that, you will be prompted in a series of steps:
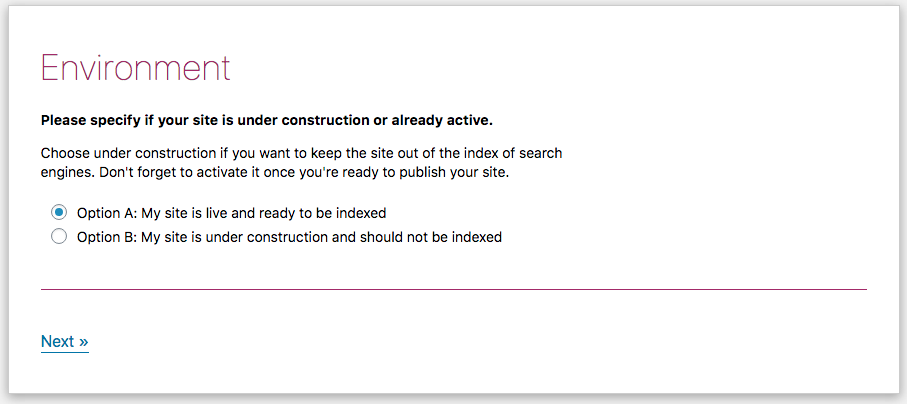
- Environment
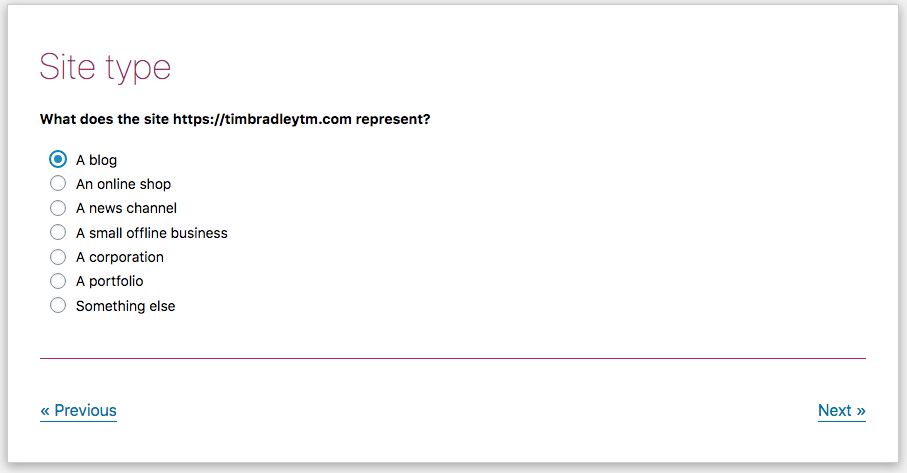
Even if your site is under construction you can choose the ‘Option A’ as long as you are blocking the site from being accessed in some other way like a password-protected ‘Coming Soon Page’. - Site type
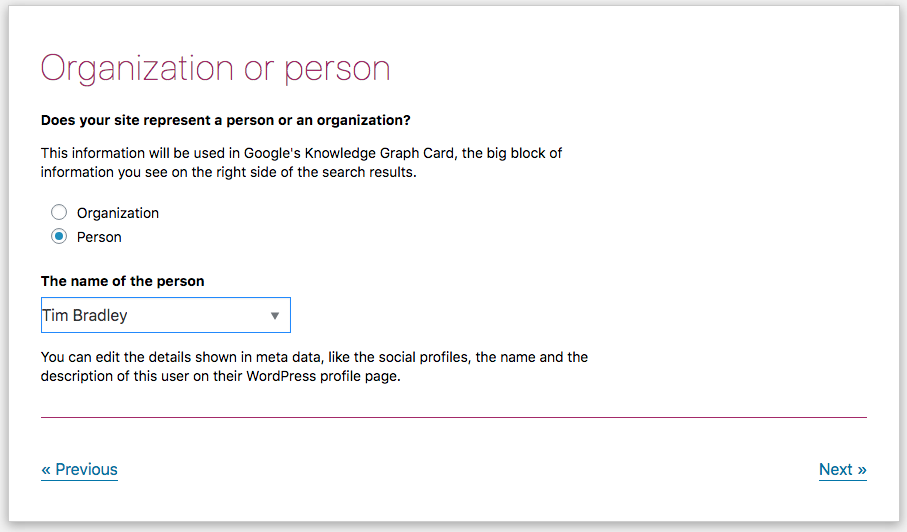
Choose the site type that is most closely aligned with what you are doing on your site. - Organization or person
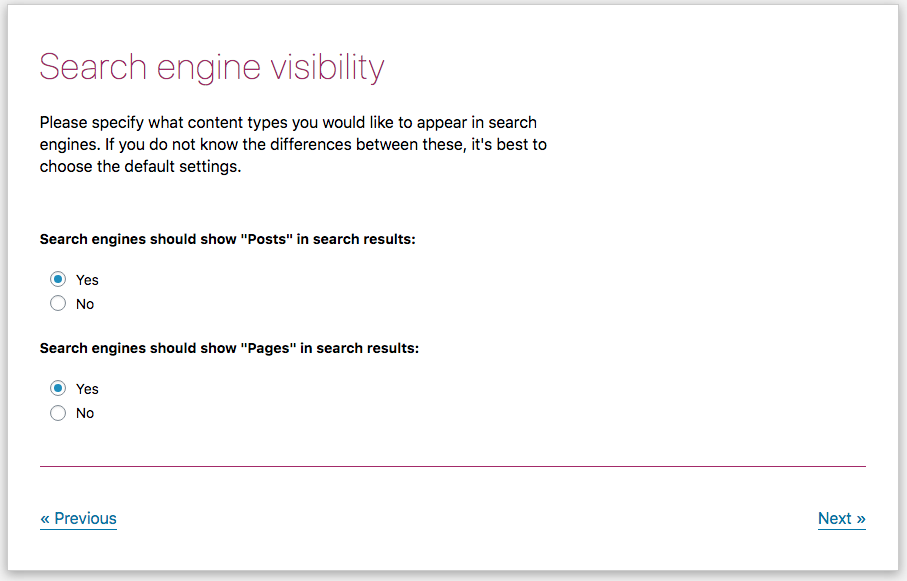
Make sure you have entered all of your profiles bio and picture in your user configuration in the Dashboard. Especially if your site is about you. - Search engine visibility
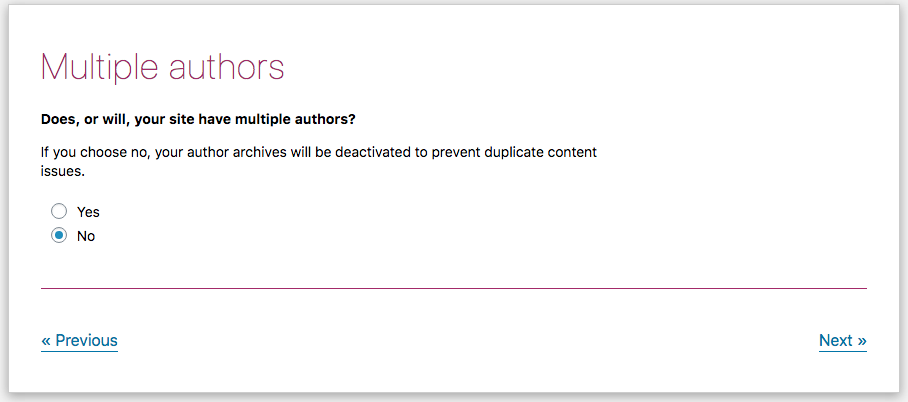
Yes and Yes. - Multiple authors
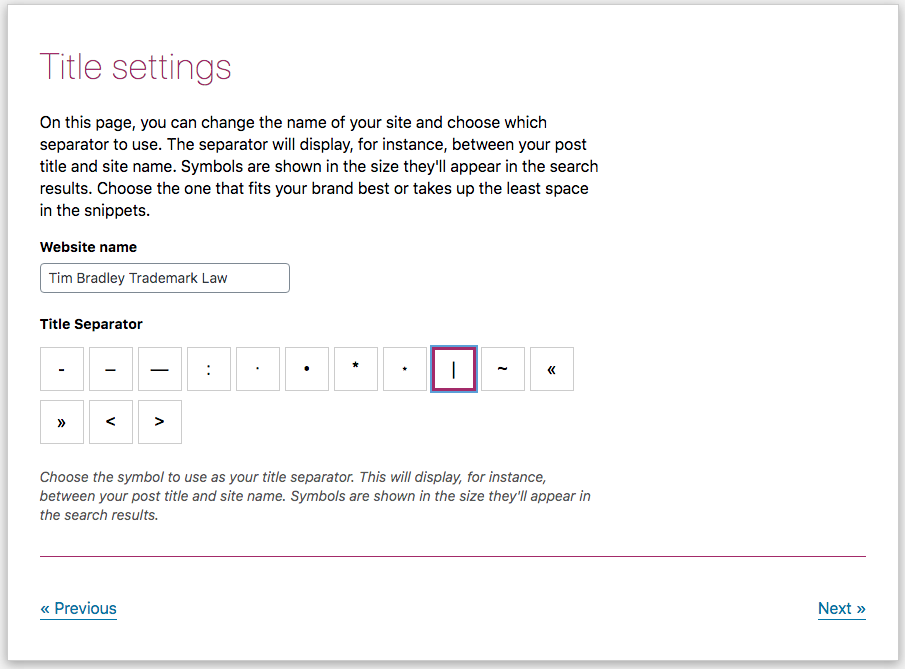
Say No unless you are certain at this point in time that there will be multiple authors. - Title settings
I am a fan of the ‘|’ (known as a pipe) myself. This character will separate your site name from your blog post name in your post header titles.
You will see these in SERPs (Search Engine Result Pages) and at the top of your browser window when you are displaying your pages.
After you complete the Yoast Setup Wizard there is one last important thing you must do. Since we have enabled an XML-Sitemap already, you must disable the Yoast XML Sitemap.
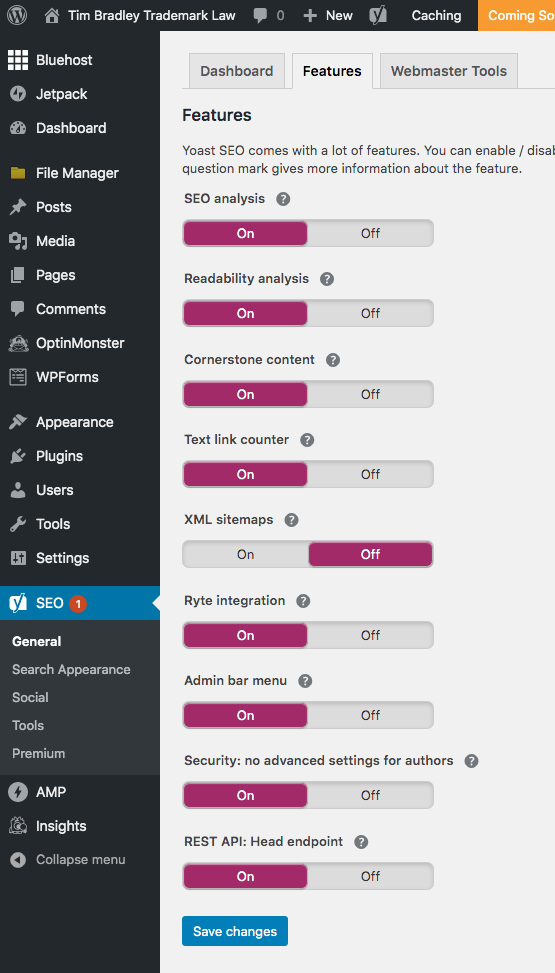
Toggle the ‘XML sitemaps’ to the ‘Off’ position and click ‘Save changes’
Schema & Structured Data for WP & AMP
By Magazine3
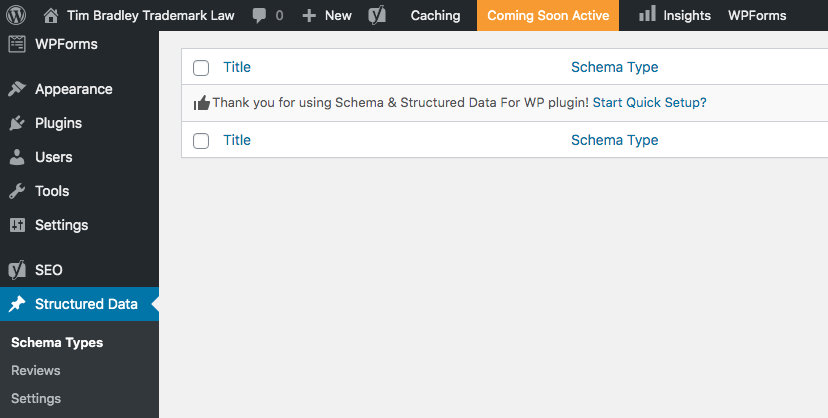
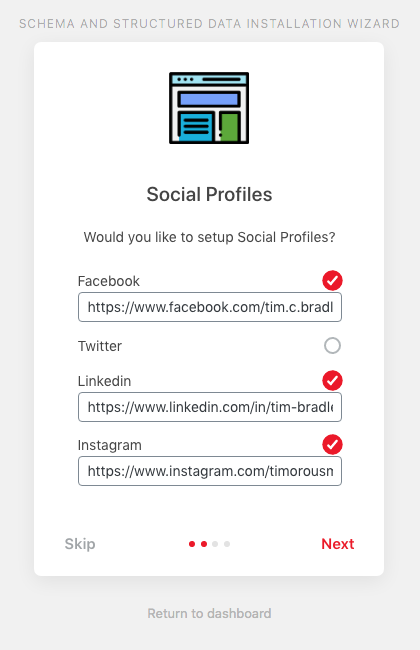
Click on the following link to learn a little more about structured data. Once you have installed and activated the Schema & Structured Data for WP & AMP plugin follow these steps to configure it for your site:
- Click ‘Structured Data’ on the sidebar of your WordPress Dashboard and then click ‘Start Quick Setup?’.
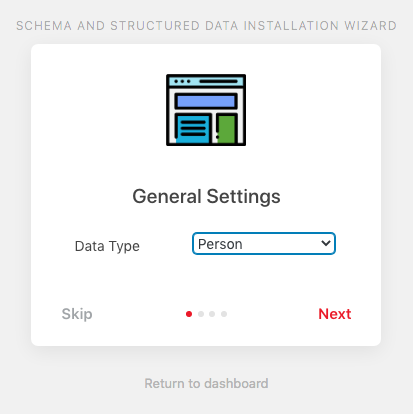
This will take you into the Setup Wizard. - Click ‘Start’ and then choose the ‘Data Type’:
Choose between ‘Organization’ and ‘Person’ and click ‘Next’ - Add your social media profiles that you would like to associate with your site.
Click ‘Next’ - Enable the proper schema on your pages and posts. For most sites, you can select ‘Article’ for your Posts and ‘WebPage’ for your Pages. Take a look at the dropdown options however, in case you have a store or a cooking site and would like a different schema.
Click ‘Next’ and then ‘Let’s Go’

You will need to review the settings for this plugin after you choose a theme for your site and ad your service pages.
Akismet Anti-Spam
By Automattic
You will need this plugin eventually when you start getting spammed in your comments sections. You can wait to activate it until then if you like.
AMP
By AMP Project Contributors
This plugin allows mobile devices and apps to read a lightweight version of your posts and pages. This will help you rank better in search now that speed is such a prevalent factor when it comes to ranking in search engines. Install and activate this plugin with the default settings for now.
Duplicate Post
By Enrico Battocchi
Copy posts and pages with one click. I use this all the time to use the formatting from an existing post or to test variants in a draft before publishing.
Easy Table of Contents
By Steven A. Zahm
This plugin is incredibly well automated and very helpful when it comes to the readability of your longer posts as well as ranking well in search results.
Enable support in ‘Settings > Table of Contents >’ for both ‘Posts’ and ‘Pages’.
Check the box to ‘Auto Insert’ for ‘Posts’
See how I configured the Easy Table of Contents plugin: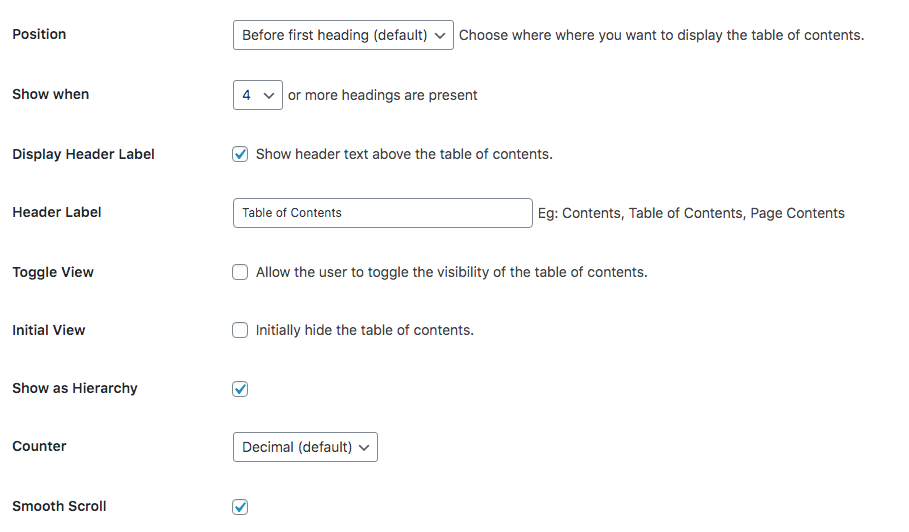
I automatically apply it to the following header types:
Redirection
By John Godley
Meks Smart Social Widget
By Meks
Install and activate this plugin.
Shortcodes Ultimate
By Vladimir Anokhin
Install and activate this plugin.
As I write this the ‘Shortcode Ultimate’ plugin gives you 64 shortcodes that allow you to add the following elements to your posts and pages simply by adding the appropriate text in square [] brackets.
Some WordPress themes may already have some of these features but all themes can benefit from the installation of these shortcodes. Check out examples of the functionality the Shortcode Ultimate Plugin here.
14Choose a WordPress Theme
Geolocation IP Detection
By Yellow Tree (Benjamin Pick)
GDPR Cookie Consent Banner
By WebToffee
Jetpack by WordPress.com
By Automattic
MC4WP: Mailchimp for WordPress
By ibericode
ThirstyAffiliates
By ThirstyAffiliates
Widget Options
By Widget Options Team
WPForms Lite
By WPForms
Hummingbird
By WPMU DEV
Smush
By WPMU DEV
